Chocolate Lava Cakes: 9 Effortless Fixes for Dinner-Imploded, Real-Pants Nights
This whole thing started because dinner absolutely imploded.
I had plans. Actual plans. I’d even put on real pants, which should’ve been my first warning sign. Takeout night. Easy. Minimal dishes. Everyone fed without me touching the stove. Then my phone buzzed. And buzzed again. And then that dreaded little notification popped up: “Order canceled — driver unavailable.”
I stood in my kitchen, shoes still on, staring into the fridge like it Chocolate Lava Cakes had personally betrayed me. Dinner was already a scramble, kids were circling like hungry sharks, and my dog was barking at the oven because apparently he thought it could help. The clock was doing that thing where it moves faster when you’re stressed.
I pivoted. Hard.
I threw together a very unglamorous dinner — eggs, toast, some leftover roasted veggies that had seen better days — and everyone ate it without complaint, which honestly felt like a miracle. Crisis mostly averted.
Except then someone said it.
“What about dessert?”
I laughed. Like, actually laughed out loud. Dessert was not on the schedule. Dessert was canceled along with takeout. Dessert was a dream from a past life.
But then I remembered the chocolate.
Not fancy chocolate. Not pastry-chef chocolate. Just a half-used bag of semi-sweet chips shoved behind the flour, plus a lonely stick of butter and a couple eggs that were still within the “I think these are fine” window.
Chocolate lava cakes weren’t planned. They were a last-ditch move. A “let’s see if this works before bedtime melts down” situation. I mixed everything in one bowl while answering texts, wiped cocoa powder off the counter with a dish towel that definitely wasn’t clean, and shoved the ramekins into the oven with a silent prayer.
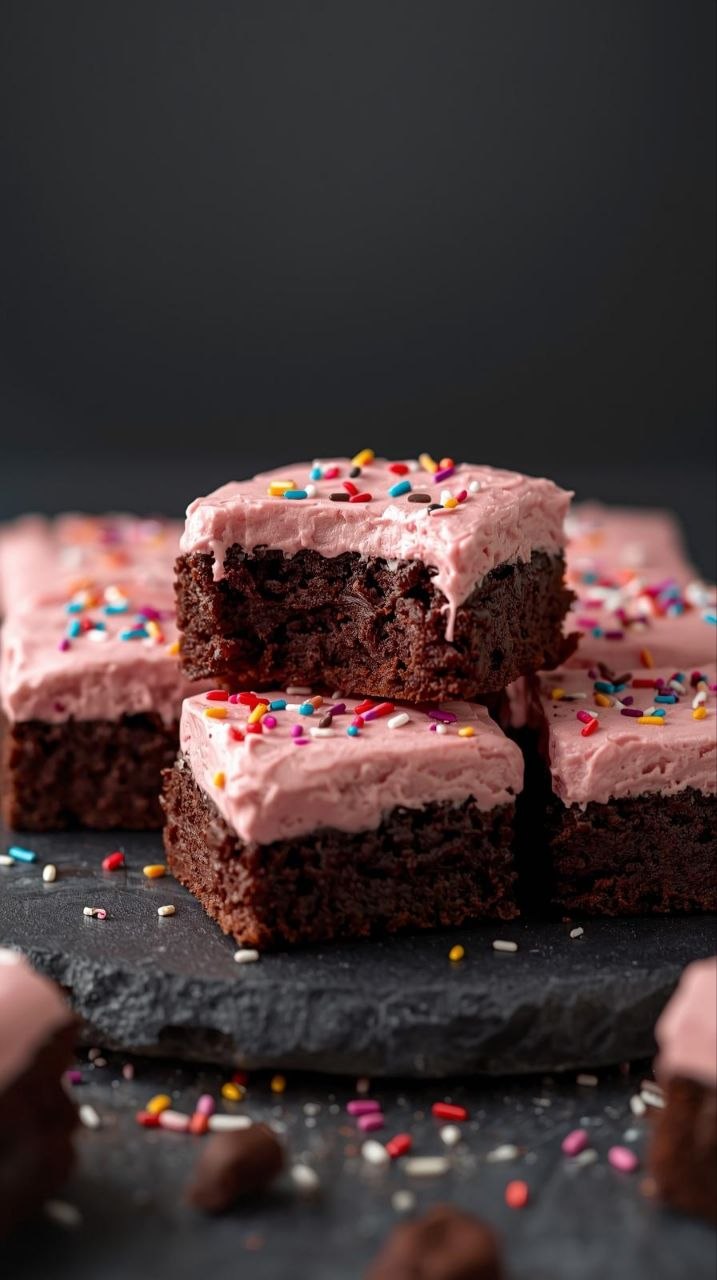
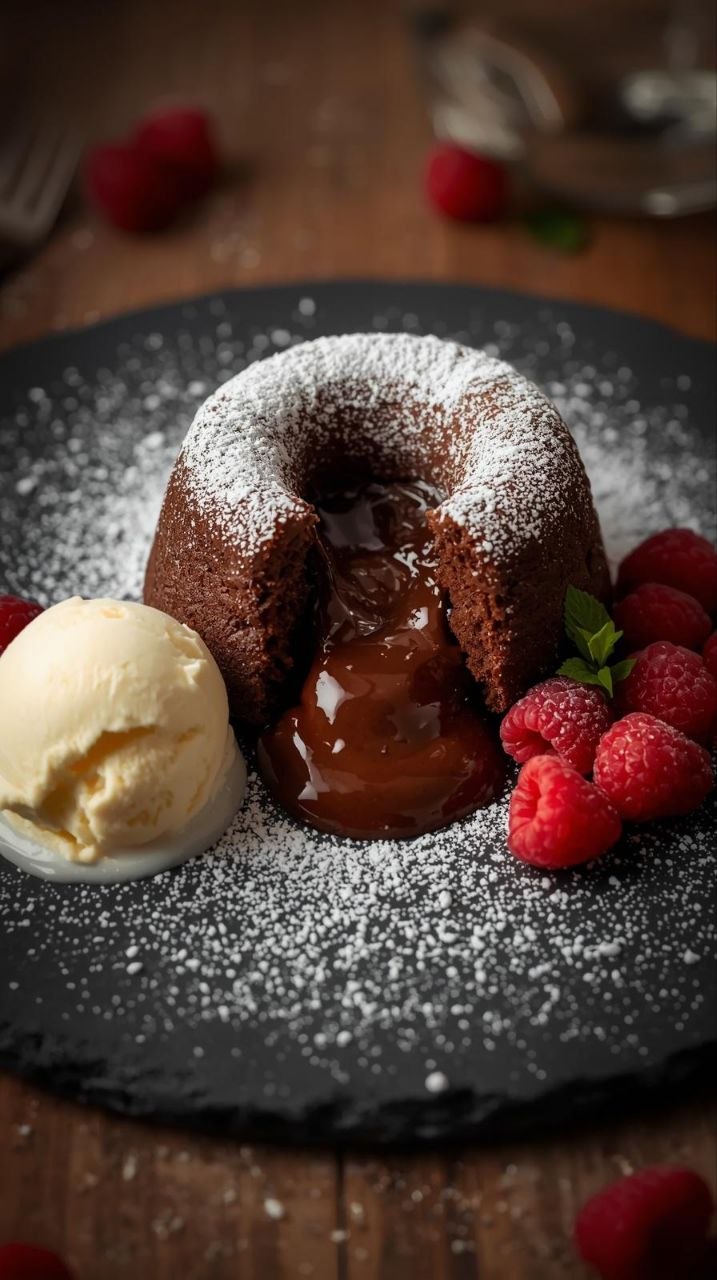
And somehow — somehow — they came out perfect. Crackly tops. Warm, molten centers. The kind of dessert that makes people forget dinner was weird.
That night, chocolate lava cakes didn’t just save dessert. They saved the vibe.
2. Why You’ll Love This Chocolate Lava Cakes Recipe
- It rescues nights when dinner plans fall apart and morale is low
- It uses basic pantry ingredients I almost always have
- It feels fancy without being fussy or stressful
- It bakes fast, which matters when everyone is already tired
- It delivers dramatic, gooey centers with very little effort
- It turns a chaotic evening into something cozy and memorable
3. Practical Guidance (Polished & Scannable)
Ingredient Tips (What + Why)
- Chocolate: Semi-sweet is my go-to. It melts smoothly and balances sweetness. Chocolate chips work great because they’re predictable.
- Butter: Real butter matters here. It gives structure and richness.
- Eggs: These are the backbone. They create that just-set edge with a molten middle.
- Sugar: Granulated sugar helps with structure and that crackly top.
- Flour: Just enough to hold things together. Too much and you lose the lava.
- Vanilla: Optional but cozy. It rounds everything out.
- Salt: A tiny pinch wakes up the chocolate.
Substitutions (And Results)
- Dark chocolate: Richer, less sweet. Still excellent.
- Milk chocolate: Sweeter and softer texture.
- Coconut oil instead of butter: Works, but flavor is lighter.
- Gluten-free flour blend: Works if it’s a 1:1 blend. Texture stays good.
Cooking Mistakes to Avoid (With Fixes)
- Overbaking: This is the big one. Pull them when the edges are set but centers jiggle.
- Cold batter: If your batter is cold, baking time changes. Let it sit a few minutes.
- Skipping greasing: Grease the ramekins generously or they’ll stick.
- Too much flour: Measure carefully — lava cakes are delicate.
What to Serve With It
- Vanilla ice cream (obvious and perfect)
- Fresh berries
- Whipped cream
- A dusting of powdered sugar
- Strong coffee or espresso
Storage + Reheating (Texture Fixes)
- Best eaten fresh.
- If needed, refrigerate for up to 2 days.
- Reheat gently in the microwave for 10–15 seconds.
- Don’t overheat or the center will fully set.
4. Ingredient Chat (Pantry Reality)
Let’s be honest — this isn’t a “trip to the store” dessert. This is a “what do I already have and can I make magic from it” situation.
I eyeball the chocolate. Somewhere between a cup and “that looks right.” Butter is usually one stick, sometimes a little less if I’ve already hacked into it earlier in the week. Eggs come straight from the fridge, sometimes with me whispering encouragement at them to behave.
The flour is minimal — just enough to help the cakes hold together when you flip or spoon into them. Sugar is basic granulated. Nothing fancy. No pastry flour. No double boiler nonsense.
This recipe is forgiving. It wants to work with you, not against you.
5. Cooking Adventure (Narrative Guide)
I start by preheating the oven because forgetting that step has burned me before. While it heats, I grab my ramekins — mismatched, slightly chipped, very loved — and butter them aggressively. I dust them with cocoa powder because flour leaves white streaks and cocoa feels right.
Chocolate and butter go into one bowl. I microwave in short bursts, stirring each time, because scorching chocolate is heartbreaking. When it’s glossy and smooth, I let it cool slightly so it doesn’t scramble the eggs.
Eggs and sugar get whisked together until they look thick and pale. Not whipped — just cohesive and smooth. I pour in the chocolate, add vanilla and salt, then gently fold in the flour.
The batter is silky. Thicker than cake batter, thinner than brownie dough. If it looks too stiff, I pause and reassess. Sometimes I add a teaspoon of melted butter to loosen it.
I divide the batter evenly, wiping drips off the sides because burnt chocolate smells aggressive. The ramekins go onto a baking sheet, and into the oven they go.
Now comes the hardest part: waiting.
At around 9 minutes, I check. The edges should look set. The centers should still look soft and slightly domed. If they jiggle gently when nudged, they’re ready.
Out of the oven, they rest for a minute. This matters. Too soon and they collapse. Too late and the center firms up.
I invert one onto a plate as a test. It slides out cleanly. The center spills just slightly. Success.
Mishaps & Fixes (This Round)
- Chocolate seized: Fixed with a teaspoon of warm butter.
- Forgot salt: Sprinkled flaky salt on top after baking.
- Overfilled ramekin: Scooped a little out and baked the extra in a mug.
- Uneven bake: Rotated the pan halfway through.
6. Life + Recipe Reflection
This is why chocolate lava cakes earn their place in my kitchen. They’re not about perfection. They’re about recovery. About saving a night that didn’t go according to plan.
When dinner falls apart, dessert can still be special. And sometimes, that’s enough.
7. Variations & Remix Ideas
- Peanut butter center: Drop a spoonful in the middle before baking.
- Mint chocolate: Add a splash of peppermint extract.
- Espresso boost: Stir in instant espresso powder.
- Orange zest: Bright and cozy.
- Angle-inspired variation: Make them after dinner chaos as a reset ritual.
8. Extra Tips & Mistakes
Quick Wins
- Use a baking sheet for stability.
- Let batter rest 5 minutes.
- Serve immediately.
- Dust with powdered sugar last minute.
- Warm plates keep centers gooey.
Honest Mistakes
- Baking too long “just to be safe”
- Not greasing enough
- Using cold eggs
- Overmixing batter
9. FAQ (Conversational)
Can I make these ahead?
You can prep the batter and refrigerate for a few hours. Bake just before serving.
Do I need ramekins?
Muffin tins work in a pinch. Grease well.
Why didn’t mine ooze?
Likely overbaked. Pull them sooner next time.
Are chocolate lava cakes safe?
Yes — eggs are gently cooked. The center is soft, not raw.
10. Warm Wrap-Up
If your dinner plans ever collapse in spectacular fashion, keep this recipe in your back pocket. Chocolate lava cakes don’t fix everything — but they fix enough. And sometimes, that’s exactly what a night needs.
If you try them, make them yours. Add something weird. Skip something fancy. That’s how the best kitchen wins happen.
Printable Recipe Card
Chocolate Lava Cakes
Prep Time: 10 minutes
Cook Time: 10 minutes
Total Time: 20 minutes
Servings: 4
Estimated Calories: 420 per serving
Ingredients
- 6 oz semi-sweet chocolate
- ½ cup unsalted butter
- 2 large eggs
- 2 large egg yolks
- ¼ cup granulated sugar
- 2 tbsp all-purpose flour
- 1 tsp vanilla extract
- ¼ tsp salt
- Butter and cocoa powder for greasing ramekins
Instructions
- Preheat oven to 425°F. Grease four ramekins with butter and dust with cocoa powder.
- Melt chocolate and butter together until smooth. Cool slightly.
- Whisk eggs, egg yolks, and sugar until thick.
- Stir in melted chocolate mixture, vanilla, and salt.
- Gently fold in flour.
- Divide batter evenly among ramekins.
- Bake for 9–11 minutes until edges are set and centers are soft.
- Let rest 1 minute, then invert onto plates or serve in ramekins.
- Serve immediately.