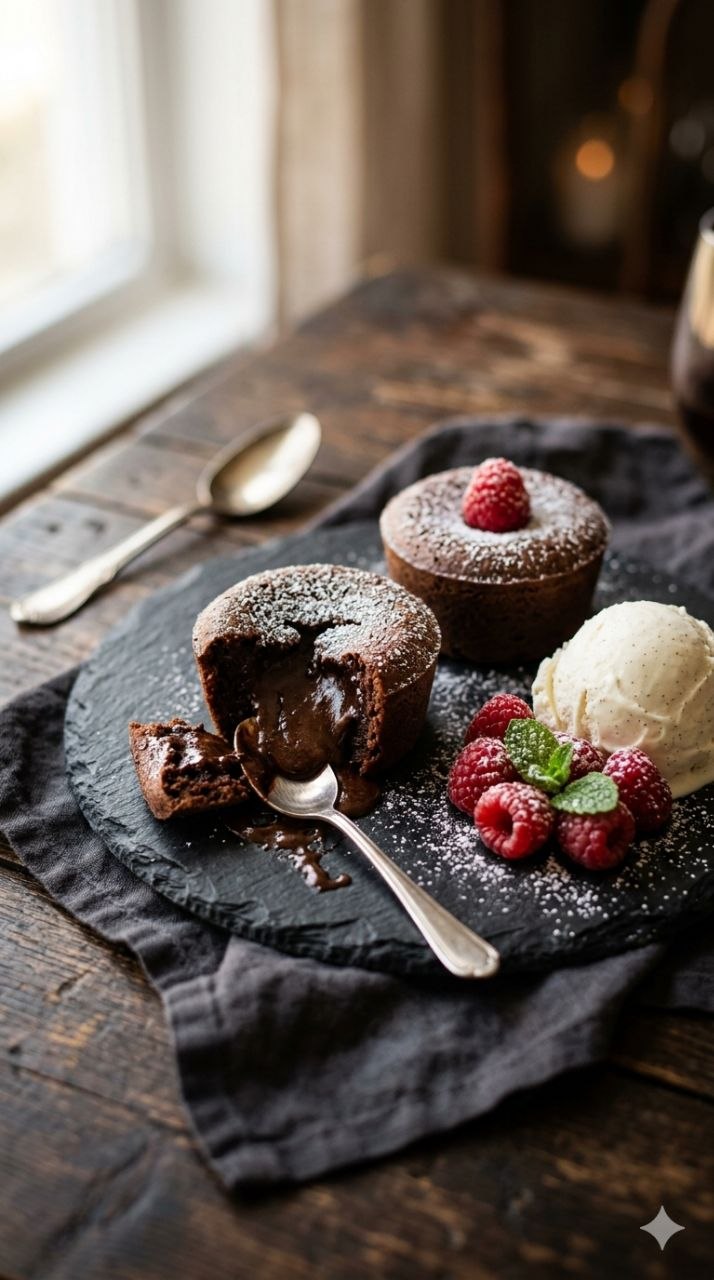
Mini Chocolate Lava Cakes for Two: 2 Effortless Fixes for Busy Adult Dinner Nights
1. Hook / Kitchen Chaos Story
I made these Mini Chocolate Lava Cakes for Two on a night that technically counted as “free time,” but emotionally felt like I was still clocked in. Dinner dishes were drying on the rack. My phone kept lighting up with group texts I didn’t have the energy to answer. The dog was pacing because he’s convinced nighttime means second dinner. And I was standing in my kitchen in socks, staring into the pantry like maybe it would whisper encouragement.
I didn’t want a whole baking project. I didn’t want leftovers haunting the fridge for days. I just wanted something warm, chocolatey, and reassuring — the dessert equivalent of putting on a hoodie straight from the dryer.
So I grabbed a small saucepan, two mismatched ramekins, and a bar of chocolate I’d been “saving” (which is a lie I tell myself). I had music playing from my phone, low enough that I could still hear the oven preheating and the dog sighing dramatically behind me. I cracked an egg one-handed and dropped a shell straight into the bowl. Fished it out with a spoon like nothing happened. This was that kind of night.
These Mini Chocolate Lava Cakes for Two aren’t about impressing anyone. They’re about creating a tiny pocket of cozy in the middle of adult chaos. They’re fast, forgiving, and just fancy enough to make the evening feel intentional — even if the rest of the day was duct-taped together.
I’ve made these when we didn’t go out like we planned. I’ve made them after long workdays when cooking dinner already took everything I had. I’ve made them when I needed a reset button that didn’t involve a screen. They bake while you lean on the counter. They smell like chocolate brownies and relief. And when you crack into that soft center, it feels like you did something kind for yourself — without turning the kitchen upside down.
This is dessert for grown-ups who are tired but still want something warm and lovely at the end of the night.
2. Why You’ll Love This Mini Chocolate Lava Cakes for Two
- They feel cozy and indulgent without being a whole production
- Perfect for a busy adult dinner when you still want a real dessert
- Made with pantry basics and one bowl (plus a saucepan)
- Small batch means no leftover temptation or pressure
- The gooey center delivers comfort fast
- Ready in under 20 minutes start to finish
- Just fancy enough to feel special, still forgiving if you’re distracted
3. Practical Guidance (Polished & Scannable)
Ingredient Tips (What + Why)
- Chocolate: Use real chocolate, not chips. Bars melt smoother and give you that rich lava center. Semi-sweet is my go-to for balance.
- Butter: Unsalted gives you control. Butter adds richness and helps create that soft, molten texture.
- Egg: One whole egg plus one yolk gives structure while keeping the center gooey.
- Sugar: Granulated sugar keeps the texture light and tender.
- Flour: Just a little — it’s there for shape, not cake-iness.
- Salt: Tiny pinch, big difference. Chocolate needs it.
Substitutions (And What Happens)
- Chocolate chips: Will work in a pinch, but the center may be slightly less fluid.
- Dark chocolate: Richer, slightly less sweet. Great if you like intense chocolate.
- Salted butter: Skip the added salt.
- Gluten-free flour: Use a 1:1 blend. Texture will be a touch softer but still lovely.
Cooking Mistakes to Avoid (With Fixes)
- Overbaking: If the tops look fully set and matte, they’ve gone too far. Pull them when the edges are set but centers jiggle.
- Sticking to ramekins: Butter generously. No one wants to excavate dessert.
- Too-hot chocolate mixture: Let it cool slightly before adding eggs to avoid scrambling.
What to Serve With It
- Vanilla ice cream (classic, melty contrast)
- Whipped cream with a pinch of salt
- Fresh berries if you want balance
- Strong coffee or espresso
Storage + Reheating (Texture Fixes)
These are best fresh. If needed, refrigerate baked cakes up to one day. Reheat gently in the microwave for 10–15 seconds — just enough to soften the center again.
4. Ingredient Chat (Pantry Reality)
This recipe lives in that sweet spot where you probably already have everything. I’m talking a chunk of chocolate that’s been hanging out in the back of the pantry, butter that’s maybe a little too soft, an egg, and a scoop of flour you eyeball instead of measure precisely at first.
You don’t need fancy cocoa percentages or special equipment. You need heat, patience for melting chocolate, and the ability to stop baking before your instincts tell you to. Trust the jiggle. That’s where the magic is.
5. Cooking Adventure (Narrative Guide)
I start by cranking the oven to 425°F and setting two ramekins on the counter. I butter them generously — sides, bottom, everything. One time I rushed this and spent five minutes chasing cake crumbs with a spoon. Learned my lesson.
Chocolate and butter go into a small saucepan over low heat. Low is important. I once tried medium because I was impatient and ended up with grainy chocolate sadness. Stir gently until smooth, then pull it off the heat and let it cool while I answer a text or refill my water.
In a bowl, I whisk the egg, extra yolk, sugar, and salt until it looks pale and slightly thickened. If you drop a bit back into the bowl, it should disappear slowly. That’s your cue.
I pour the warm (not hot) chocolate mixture in and whisk until glossy. Then I sprinkle in the flour and fold gently. Overmixing makes these dense, and nobody wants that.
I divide the batter between the ramekins, set them on a baking sheet, and slide them into the oven. Around 9 minutes, I start hovering. At 10–11 minutes, the edges are set, the centers still look soft, and the tops have lost their wet shine but aren’t cracked.
Out they come. I let them sit for one minute — not more — then invert onto plates or eat straight from the ramekins with spoons. I’ve done both. No regrets.
Mishaps I’ve survived:
- Dropped sugar on the floor mid-whisk. Scooped from a clean pile. Kept going.
- Forgot to set a timer and relied entirely on smell and vibes. Still worked.
- Slightly overbaked once. Added ice cream. Crisis averted.
6. Life + Recipe Reflection
These Mini Chocolate Lava Cakes for Two show up on nights when adulthood feels heavy but manageable. They don’t demand perfection or planning. They just ask for ten focused minutes and reward you with something warm and grounding.
They’re proof that cozy doesn’t have to be complicated — it just has to be intentional.
7. Variations & Remix Ideas
- Peppermint: Add a drop of peppermint extract during winter.
- Espresso: Stir in a pinch of instant espresso powder.
- Peanut Butter Center: Dollop a teaspoon in the middle before baking.
- Busy-Night Hack: Mix batter earlier, refrigerate, bake fresh after dinner.
8. Extra Tips & Mistakes
Quick Wins
- Use a baking sheet for easy handling
- Let batter rest 5 minutes for smoother texture
- Serve immediately for best lava flow
Honest Mistakes
- Baking too long
- Forgetting to butter ramekins
- Using chocolate that’s too sweet
9. FAQ (Conversational)
Can I make these ahead?
You can prep the batter a few hours early and bake when ready.
Do I need ramekins?
Oven-safe mugs work in a pinch.
Why didn’t mine ooze?
They likely baked too long. Pull them earlier next time.
10. Warm Wrap-Up
If you’re craving something cozy but don’t want a whole baking marathon, these Mini Chocolate Lava Cakes for Two are waiting for you. Make them your own. Eat them in socks. Let the day end gently.
Printable Recipe Card
Mini Chocolate Lava Cakes for Two
Prep Time: 5 minutes
Cook Time: 10–12 minutes
Total Time: 17 minutes
Servings: 2
Estimated Calories: 420 per serving
Ingredients
- 3 oz semi-sweet chocolate, chopped
- 4 tbsp unsalted butter
- 1 large egg
- 1 large egg yolk
- 1/4 cup granulated sugar
- 1/8 tsp salt
- 2 tbsp all-purpose flour
Instructions
- Preheat oven to 425°F. Butter two ramekins thoroughly.
- Melt chocolate and butter together over low heat until smooth. Remove from heat and cool slightly.
- In a bowl, whisk egg, egg yolk, sugar, and salt until pale.
- Whisk in melted chocolate mixture.
- Fold in flour until just combined.
- Divide batter between ramekins.
- Bake 10–12 minutes until edges are set and centers are soft.
- Serve immediately.